
Spring/Summer/Autumn 2018
Cleaning of the entire chassis was a monumental undertaking. It was decided to do it in sections - the support sleepers provided suitable dividing lines. First the chassis was brushed clear of dust, then the surfaces were needle gunned to remove scale and loose rust. The cleaned up surface was then further cleaned with a power wire brush to remove fine rust before it was painted in red oxide primer. The paint was applied for several reasons: first to prevent further rusting; second to show the workers which parts had already been "done"; and third as a morale booster to show progress, albeit painfully slow, was being made.
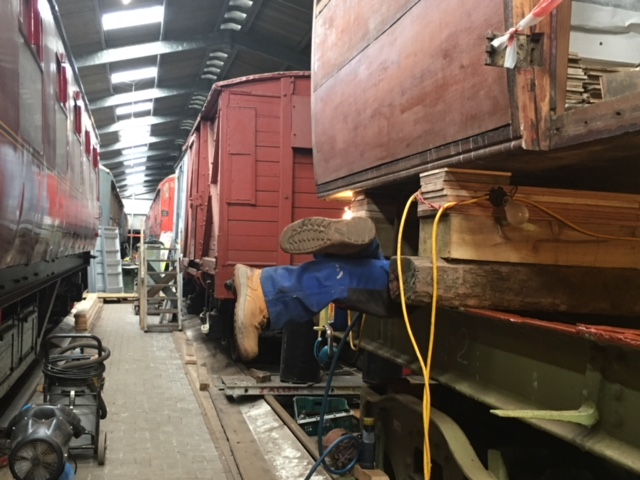
John Russell and Graham Warren did the lion's share of the needle gunning, wire brushing and sanding - their application to the job was
very much appreciated. As you can see from the above photo (courtesy J Pairman), access was not the easiest!
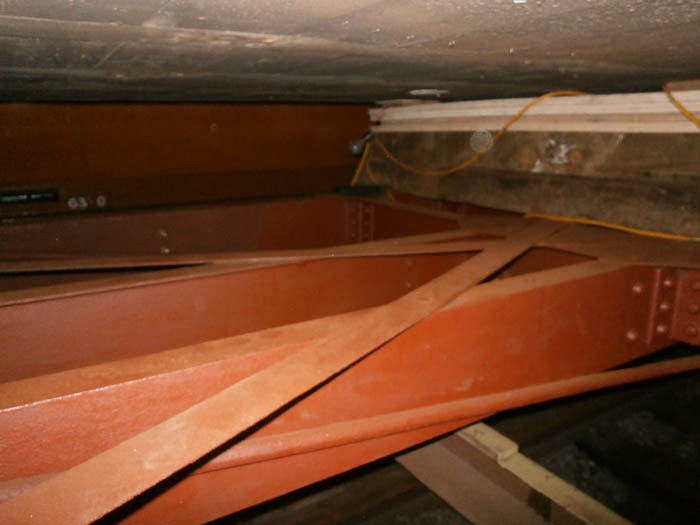
Once the east bogie area had been completed, work speeded up considerably as access to the chassis between the bogies
was very much easier and also there were fewer fiddly bits of chassis to deal with. The photo below shows part of the
cleaned and primered chassis near the centre of the carriage.
In order to allow welding of the replacement top plates at both ends of the chassis, the rivet stubs which remained after the original plates had been removed were ground off - Muir MacDougall did the east end and Graham Warren did the west end. Thanks to you both for a very gruelling and repetitive job well done!

Just before Christmas 2018 the needle gunning and power wire brushing was finally completed. At about the same time, application of anti-corrosive green paint was started - again, working from the east end towards the west end. Preparations for welding were also put in place at this time.
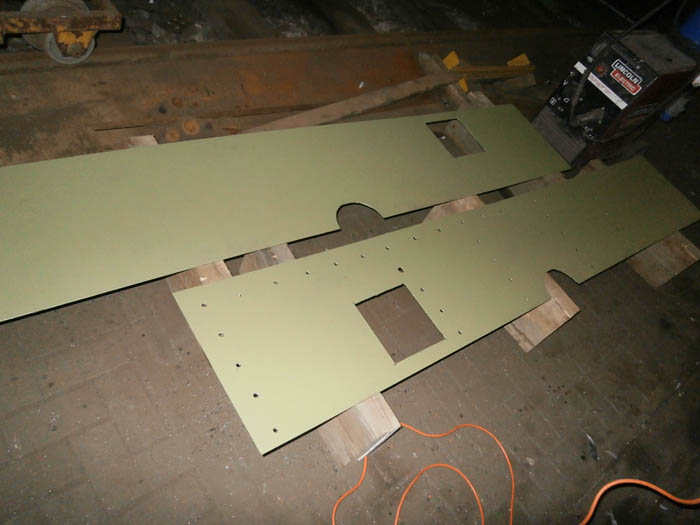
The photo above shows the undersides of the two new end plates cut and painted and partially drilled. Brian decided the best way to weld the plates was through holes drilled to match up with the ground off rivets. The west end plate was welded on first then the excess weld ground off flush with the plate. The top surface was then primed in red oxide, then anti-corrosive green was applied.